Dear Moderator,
Firstly, thank you for taking the time to view my blog and my group's blog, and I hope you enjoy viewing them!
On the right hand column of my blog underneath my picture and the section about me, you will be able to find a list of links: a blog archive of all my posts, a list of labels so you can view sections of my blog easily, a link to my group blog, and a link to our main teacher's blog, where you can also view everyone else's blogs easily too.
On my individual blog you will find all the indepedent research I did beforehand and the research and ideas I did at the beginning of the project. There is also a post on the preliminary task we completed at the beginning of the year, and seven posts on my evaluation of the main task, which I completed once our opening sequence was finished. At the top of the page I have also added the videos for my preliminary and main task, alllowing you to view the videos as often and as many times as you like!
On our group blog you will be able to find all the research, planning and production needed to produce our main task, and they have all been labelled accordingly to allow you to view our posts with ease. Each post is also labelled with the name(s) of the members which contributed to the post, so you can also see how we each contributed to the group blog, as well as our individual ones.
All my posts have been ordered chronologically, so it may be easier for you to start from my very first post and read them backwards, scrolling upwards instead downwards. All posts have been dated, from September 2010 till now, April 2011.
Thanks again for viewing my blog, I hope that you like all my posts, and hope you enjoy watching my prelim and final piece.
- Odelia Yu, Candidate No: 3920
Tuesday, 5 April 2011
Note to the Moderator
Posted by Latymer Media 2010 at 15:25 0 comments
Sunday, 3 April 2011
Evaluation Question 7:
7) Looking back at your preliminary task, what do you feel you have learnt in the progression from it to the full product?
Brief for the preliminary task:
‘Continuity task involving filming and editing a character opening a door, crossing a room and sitting down in a chair opposite another character, with whom she/he then exchanged a couple of lines of dialogue. This task should demonstrate match on action, shot/reverse shot and the 180-degree rule.’
Brief for main task:
‘The titles and opening of a new fiction film, to last a maximum of two minutes.’
Why did we do the prelim task beforehand, and what did it teach me?
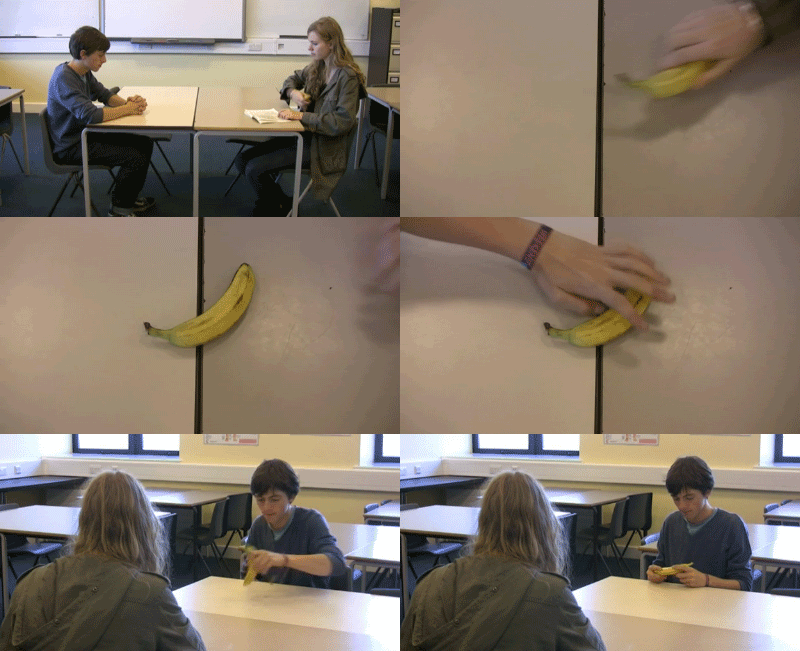
The prelim task provided us with some experience of shooting and filming a sequence, with the focus on continuity. It made us realise how much you need to consider when filming, for example which foot someone was walking on, which hand they used to hold an object…etc. Continuity was also the main focus when editing, and this taught us how important it was to cut shots together to make a sequence flow seamlessly and make it easy to understand.
Pre-production:
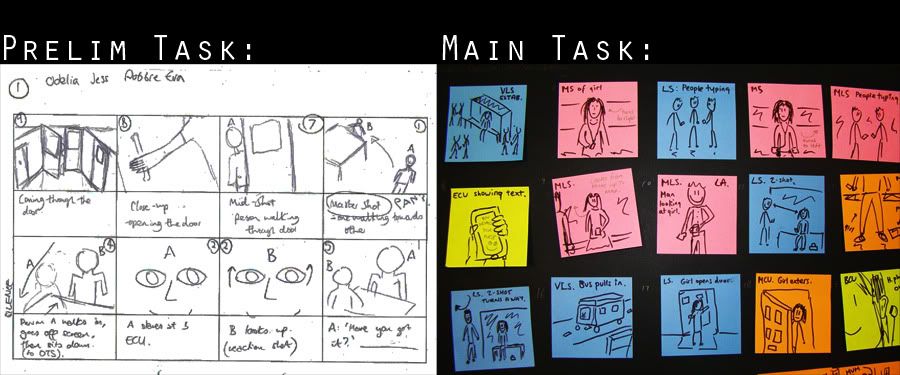
The prelim task helped me to learn that storyboarding is a key part of pre-production, and is definitely needed during production, to make shooting times quicker, easier, and more efficient.
Our prelim task was very structured, as we knew exactly what we had to do, and where we were going to shoot it: in school. This meant that we didn’t exactly have to do a location reccie; we just had to look at the room we were in, and draw up a simple storyboard around it.
However, for our final project, a location reccie was needed so that we could see where we could film it, and if it would be practical. For our scenes inside the house, it was easy to find a location, as we could just use Robbie’s house. However research was needed for our bus stop scene, and this was done via our knowledge of the area, and Google maps.
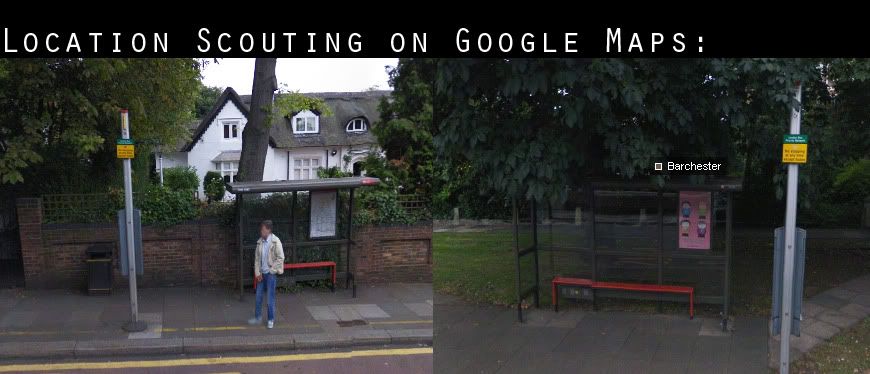
So from the pre-production of the prelim and the final project, I learnt that planning is key and essential to make production go smoothly and without any complications, and the use of storyboarding and location reccies are very important.
Our skills at drawing storyboards also progressed, with us drawing a very basic storyboard on paper for our prelim task, and a large colour-coded post-it note storyboard for our final project:
Production:
The most important thing that I learnt from the production of the prelim task in my opinion is the issue of time. We had a very tight schedule to film all our shots for our prelim, and this knowledge of time management helped in the shooting of our final project. The experience we got from filming our prelim, e.g. shooting, using the microphone and hearing through headphones, also gave us support in shooting our final opening sequence, which helped too.
The prelim also gave us the knowledge of shot order, and which shots to film first. For our prelim, we shot all the shots inside the room first, and then all the shots from outside in the hallway, and this helped us to not only save time, but to organise ourselves better. This new understanding of shot order helped us to plan for our real shoot, saving us time there as well.
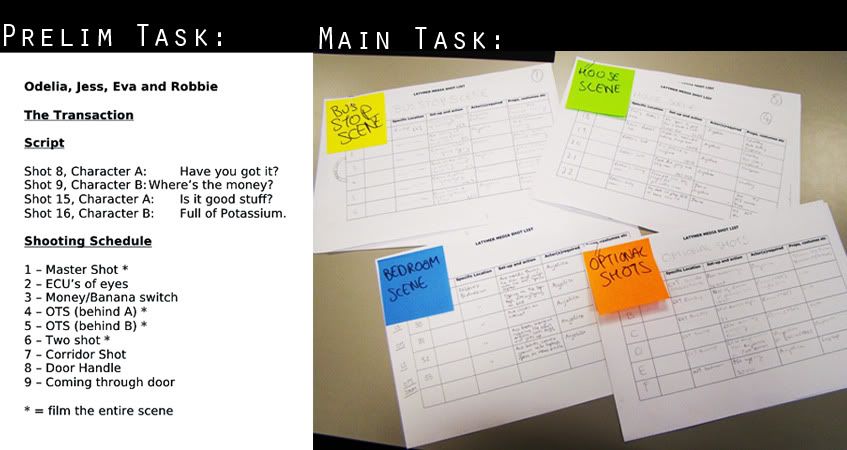
Our skills at producing shot logs and shot lists also improved, as shown by the image below. For our prelim, we only needed a few shots, so this was easily just typed up, but for our main task, we had many different shots, so we wrote out a shot list in the shooting order, and produced many different tables:
Post-production:
Editing our prelim task was beneficial for our final project as it not only familiarised us with how to use Adobe Premiere, but also reminded us of all the continuity rules and how important they are to produce a seamless narrative. The editing of the prelim task was pretty basic, as all we needed to do was cut up the shots and place them in the right order; no particular editing techniques were needed.
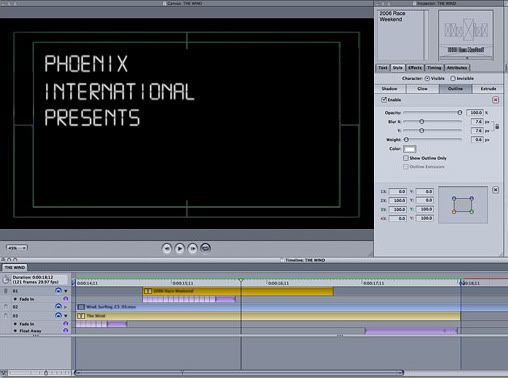
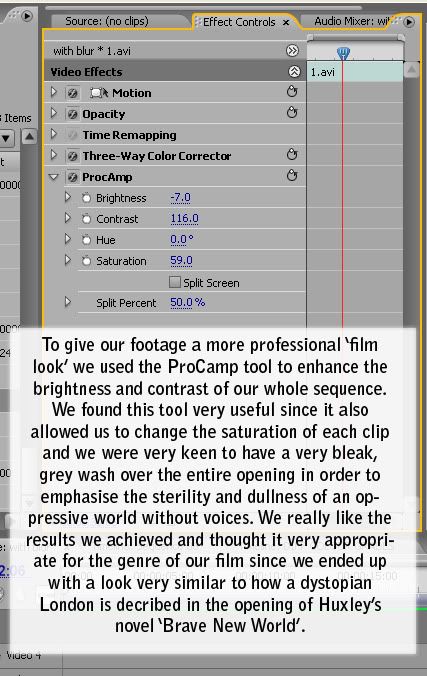
I think that was the main difference between the prelim and the main task: the new different editing techniques. I think I learnt a lot during the editing sessions of our final project, and I have progressed a lot in the use of different software. I now know how to use different colour grading tools in Adobe Premiere, and how to make titles using Live Type.
Teamwork:
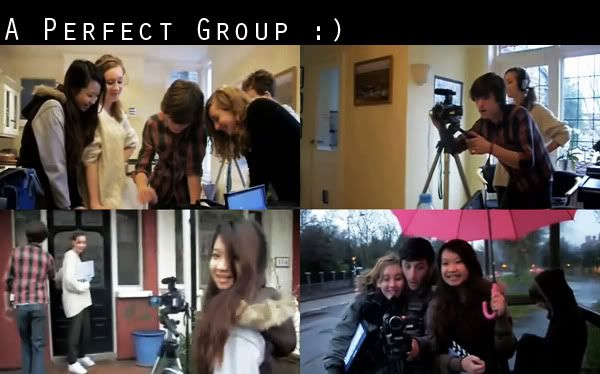
The prelim task also further increased my confidence and teamwork skills, which was vital in our final project. It made me realise how much there is to do and how you need to split the work evenly between all members, letting each person shoot a few shots, use the headphones in a few shots, and edit a few shots too. So with this knowledge, and an almost perfect combination of partners and friends to work with, I think that our project went as smoothly as possible, and I had a lot of fun making it too.
Posted by Latymer Media 2010 at 12:20 0 comments
Labels: evaluation
Friday, 1 April 2011
Evaluation Question 6:
6) What have you learnt about technologies from the process of constructing this product?
Technologies/hardware/software used during the process of constructing our opening sequence:
Production: Camera, tripod, microphone, headphones
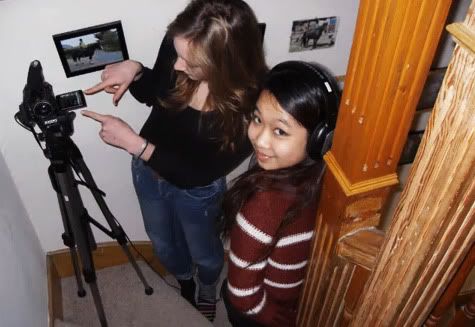
Post Production: Computer Software: Adobe Premiere, Live Type, Adobe After Effects
What have I learnt during the process of making our opening sequence?
- I learnt how to use manual settings on the camera, and how to use focus pulls. This was a very effective tool on the camera, and we used it many times while shooting, for example in the scene where Ava walks in to the living room with her brother, and when Ava walks away from the staircase and into her bedroom.
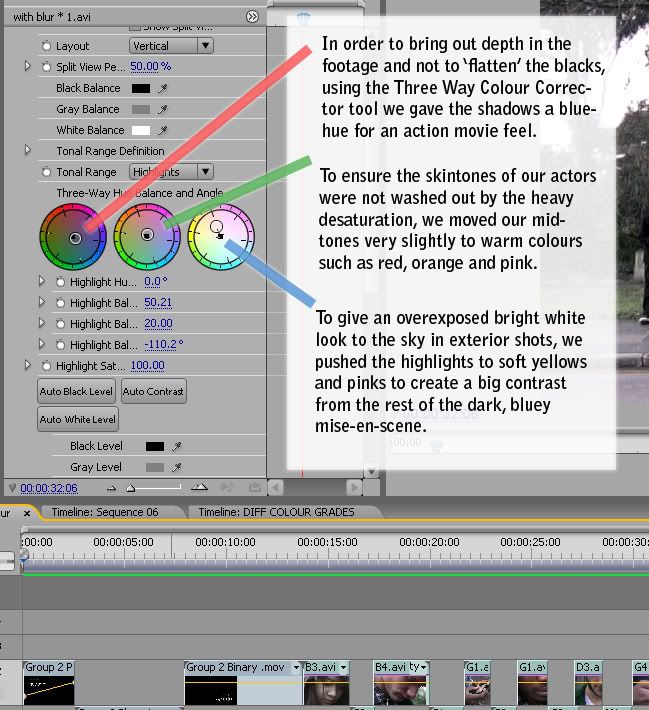
- I learnt how to use more tools and gadgets on Adobe Premiere, the main being tools used for colour grading. We watched various tutorials online and asked our media technician how to use different tools and which ones were best, for example the Three Way Colour Corrector, levels, and ProcAmp.
- I also learnt how to use the software Live Type on the Mac, and we used this to make the titles used in our opening sequence. I found that it was actually really simple to use, and extremely useful, especially as it had many preset animations already.

- I learnt how to use Adobe After Effects, which we used to de-grain some of our grainier shots, to provide a smoother, clearer image.
Before:

After:

From what I’ve learnt, what would I do differently in hindsight?
- One of the main problems we had while editing was making the stairway shots look more similar to the rest of the shots in our sequence. The stairway shots were so different due to the poor lighting, making the images dark and grainy. We overcame this problem in the end via colour grading and the de-grainer, but if I was to film this shot again, I would’ve used a pag light, to reduce the time and effort needed in post-production.
- Another problem we had was the fact that we didn’t always have the right props needed on set. On our first shoot, Ava held an iPhone with a black cover, but on our second shoot, we did not have the black cover. We overcame this problem in editing by cropping the shot so you can’t see the back of the iPhone, but if I were to shoot this again, I would make sure that all props are on hand.

Posted by Latymer Media 2010 at 13:32 0 comments
Labels: evaluation
Evaluation Question 5:
5) How did you attract/address your audience?
We decided to target a core audience of old teenagers/young adults as this was the most practical for us: it was the easiest to get teenage actors, and feedback. We then decided to choose the genre of action/drama, as this was a popular genre with our audience, as shown by the table below, which shows the 'Proportion of All Films Cited by Genre and by Age of Respondents':

Our opening sequence and film would attract our core audience of teenage/young adult action/drama/sci-fi fans because of the themes and plots in our film: action, chase scenes, love, teamwork, technology…etc. It would appeal to both genders in our core audience, with males enjoying the action scenes, violence, attractive female lead, and females enjoying the themes of romance, love, the attractive male actors and a strong, female lead they can relate to.
During the production/post-production of our opening sequence, we always kept the audience in mind, and made sure that it targeted them, for example:
Soundtrack: The song we used in the background of our opening sequence would attract our audience as it is upbeat, has a strong beat, loud bass, and is a music genre a lot of our core audience likes and listens to.
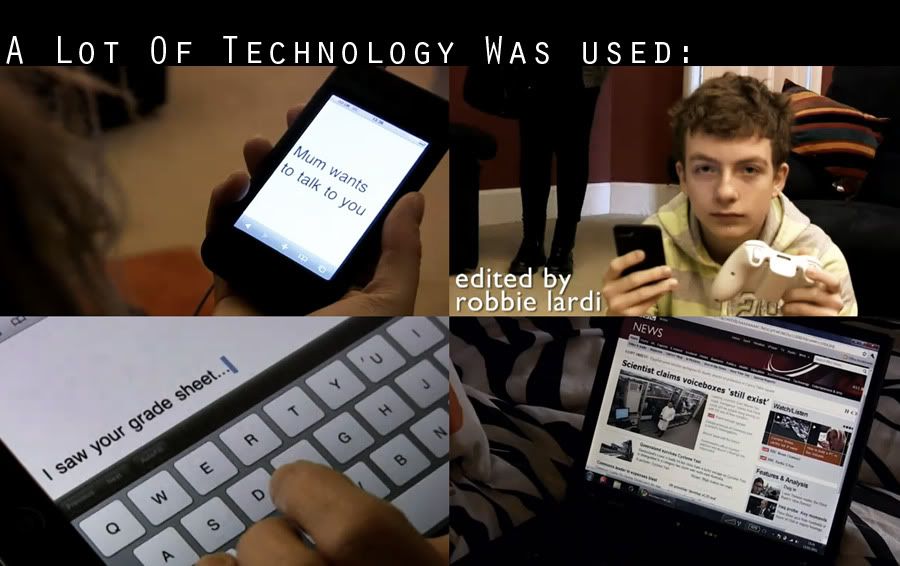
Technology: We used a lot of different technology in our opening sequence, all of which our target audience would be able to relate to and use in their daily life, e.g. phones, games consoles, mp3 players, iPods, iPads and laptops.
Editing: While editing, we decided to place a montage of shots at the beginning, which would interest our audience. We also made sure that all continuity rules were not broken, so that it would look easy on their eyes, and help them to suspend their disbelief.
After finishing our project we held a preview screening of our opening sequence in our school's media block, and asked our audience to fill out a simple questionnaire.
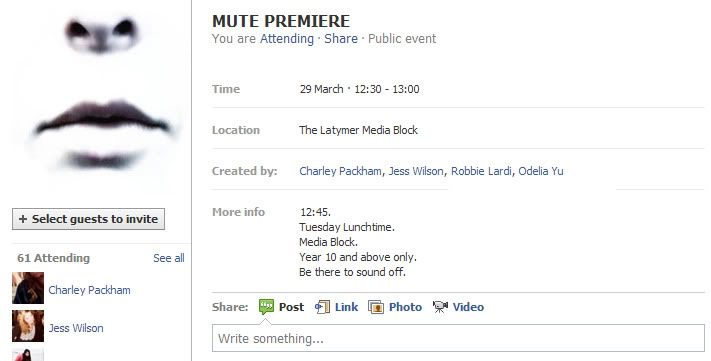
To attract our audience and get them to come to our preview screening, we put up posters around the school (especially in the areas where we know our target audience go to on an every day basis) and sent out a Facebook event, as a large percentage of our target audience use the social networking site.
Here are a few filled in questionnaires that we recieved:
Mute - Filled In Questionnaires
After looking through all the questionnaires, we also made a few charts so that we could see the trends in our results:
As you can see, we targeted both genders, with everyone giving us a rating of 6-10, but it seems as though our opening sequence and film appealed more to females, with a higher percentage of females saying that they would like to watch the film than boys.
Posted by Latymer Media 2010 at 11:19 0 comments
Labels: evaluation


